
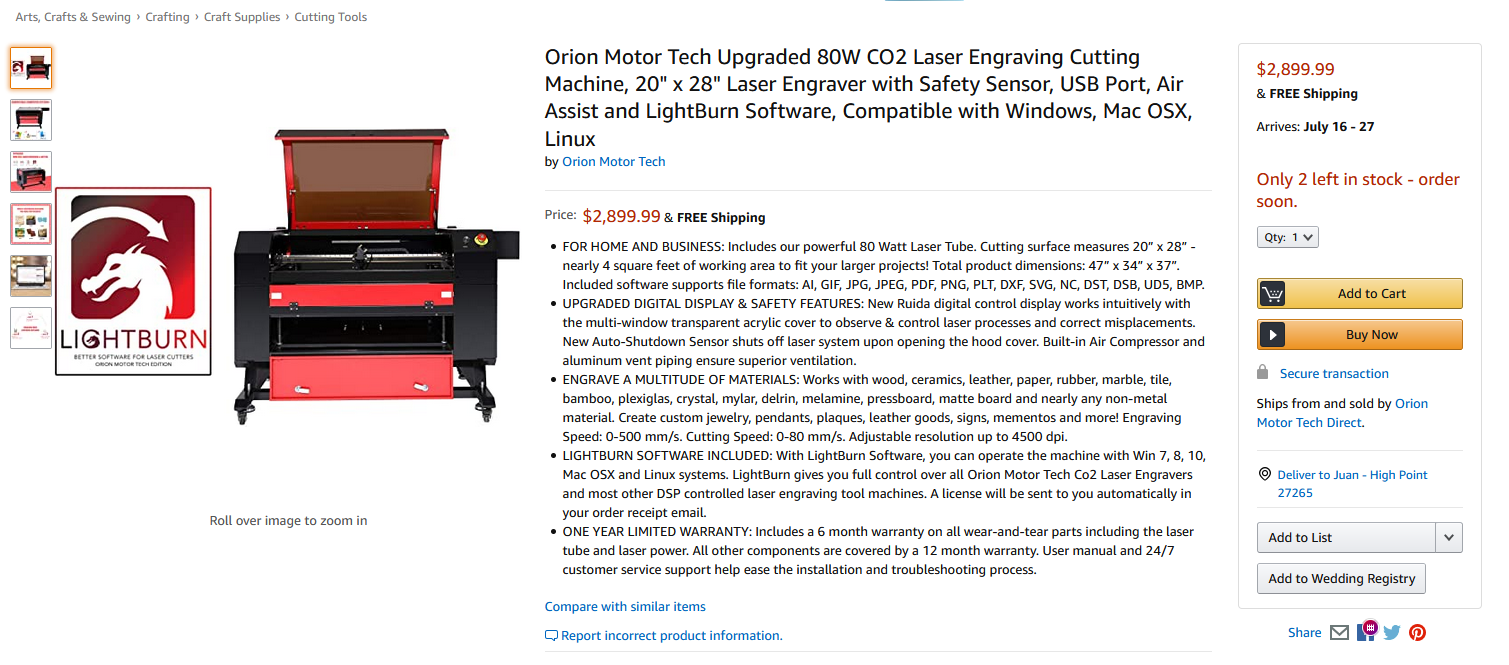
Testing and Tuning an 80W Laser Cutter from Amazon
Amidst the COVID crisis, I decided to purchase a laser cutter to aid in manufacturing face shields and eventually speed up FRC prototyping (at least that’s how I justified it to myself, anyway). At the time, many well-known laser brands were either out of stock or outside of my target budget, so I decided to take a risk on a laser purchased through Amazon. The listing advertised this model as 80W and showed that I could have it shipped to my home in about two weeks.
Shipping and Delivery
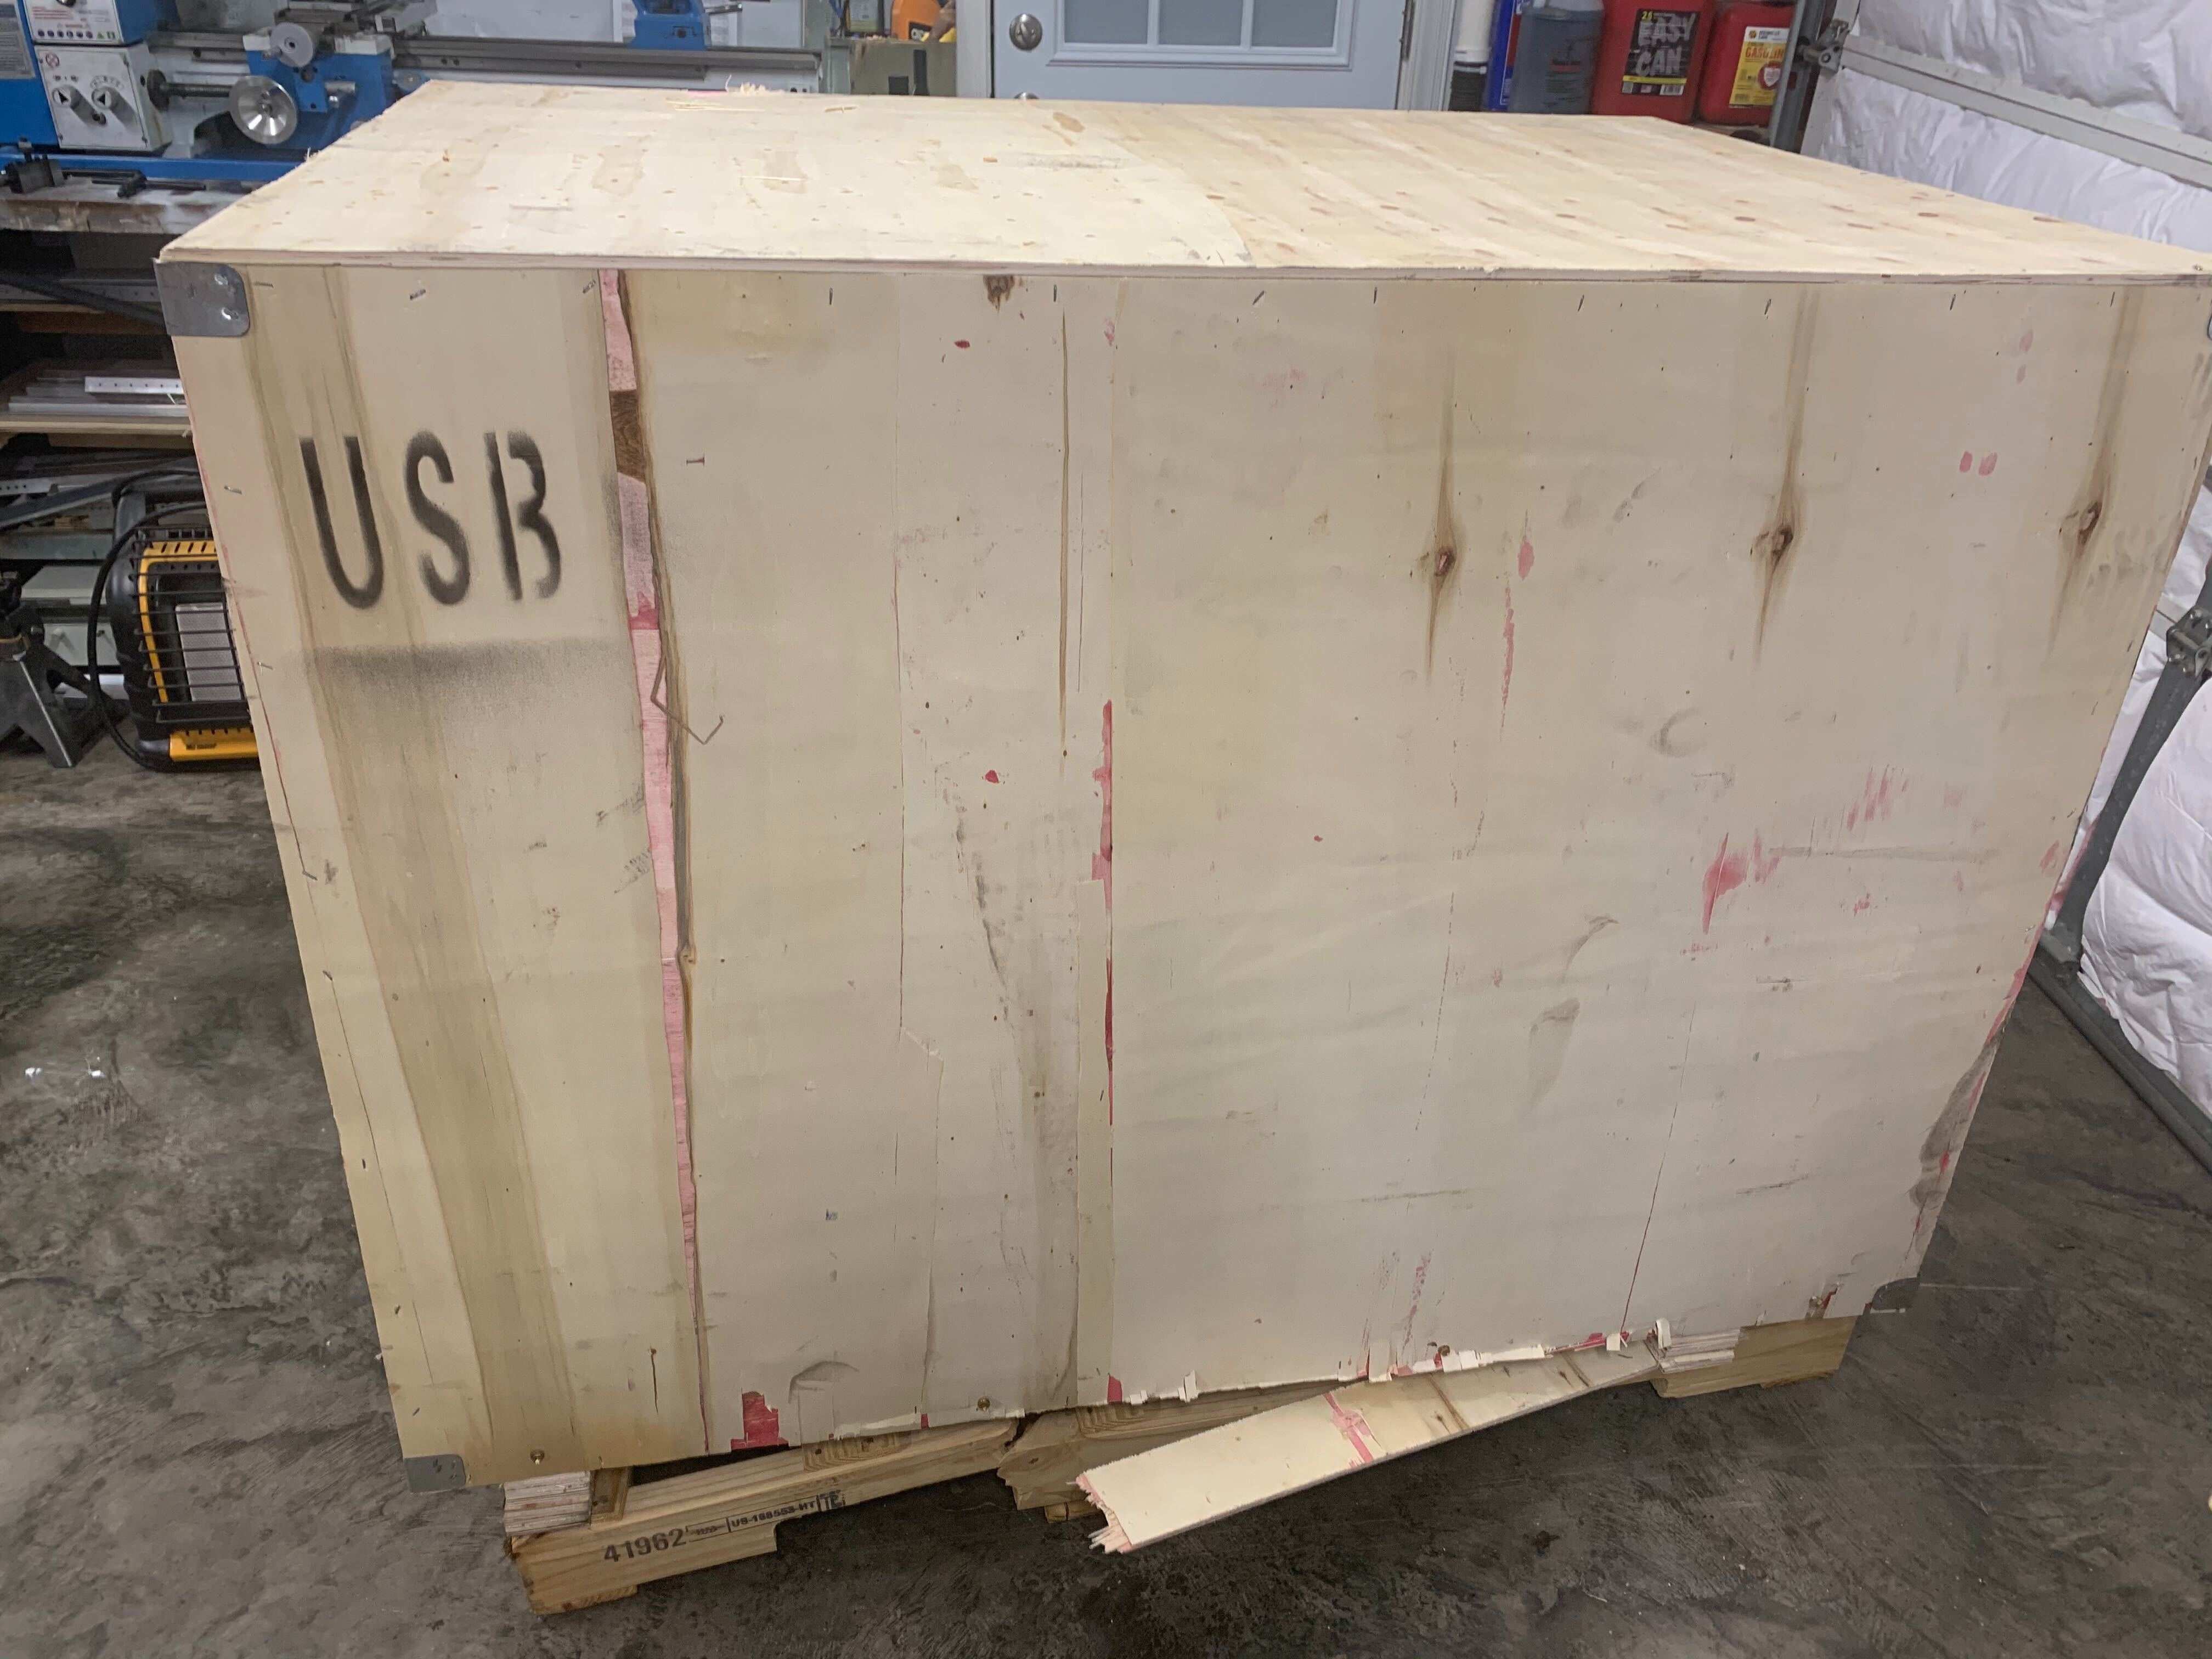
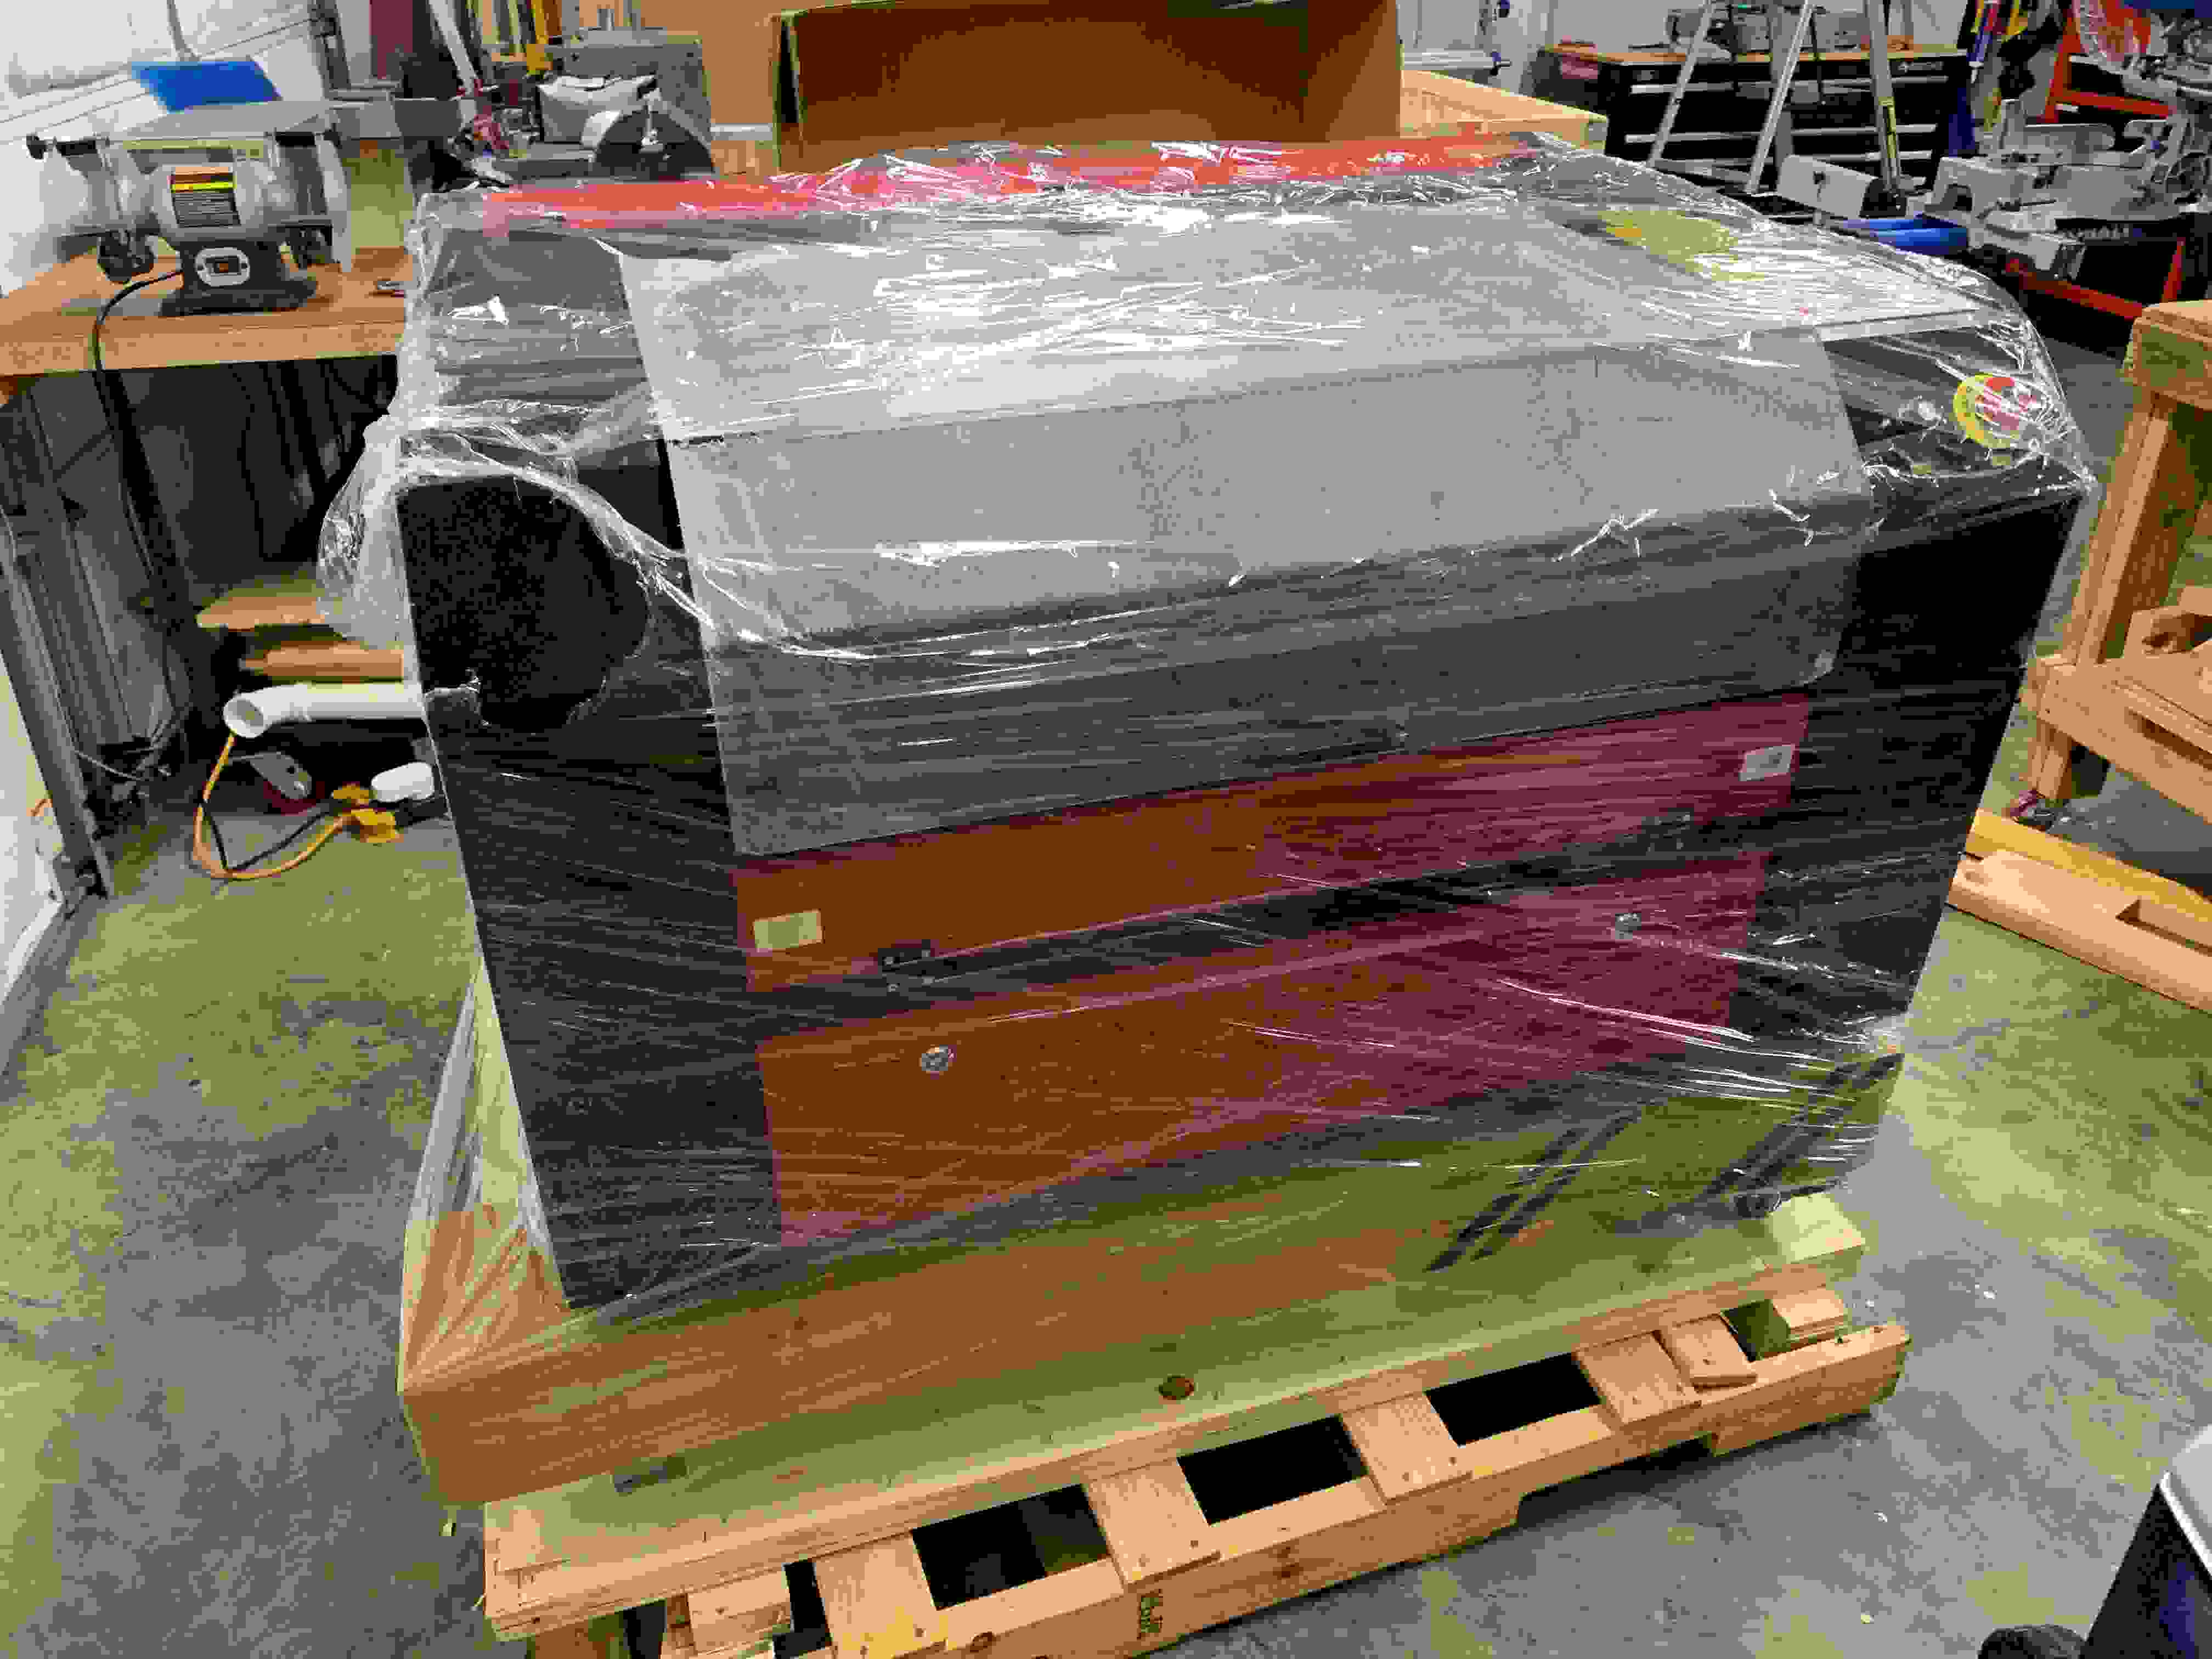
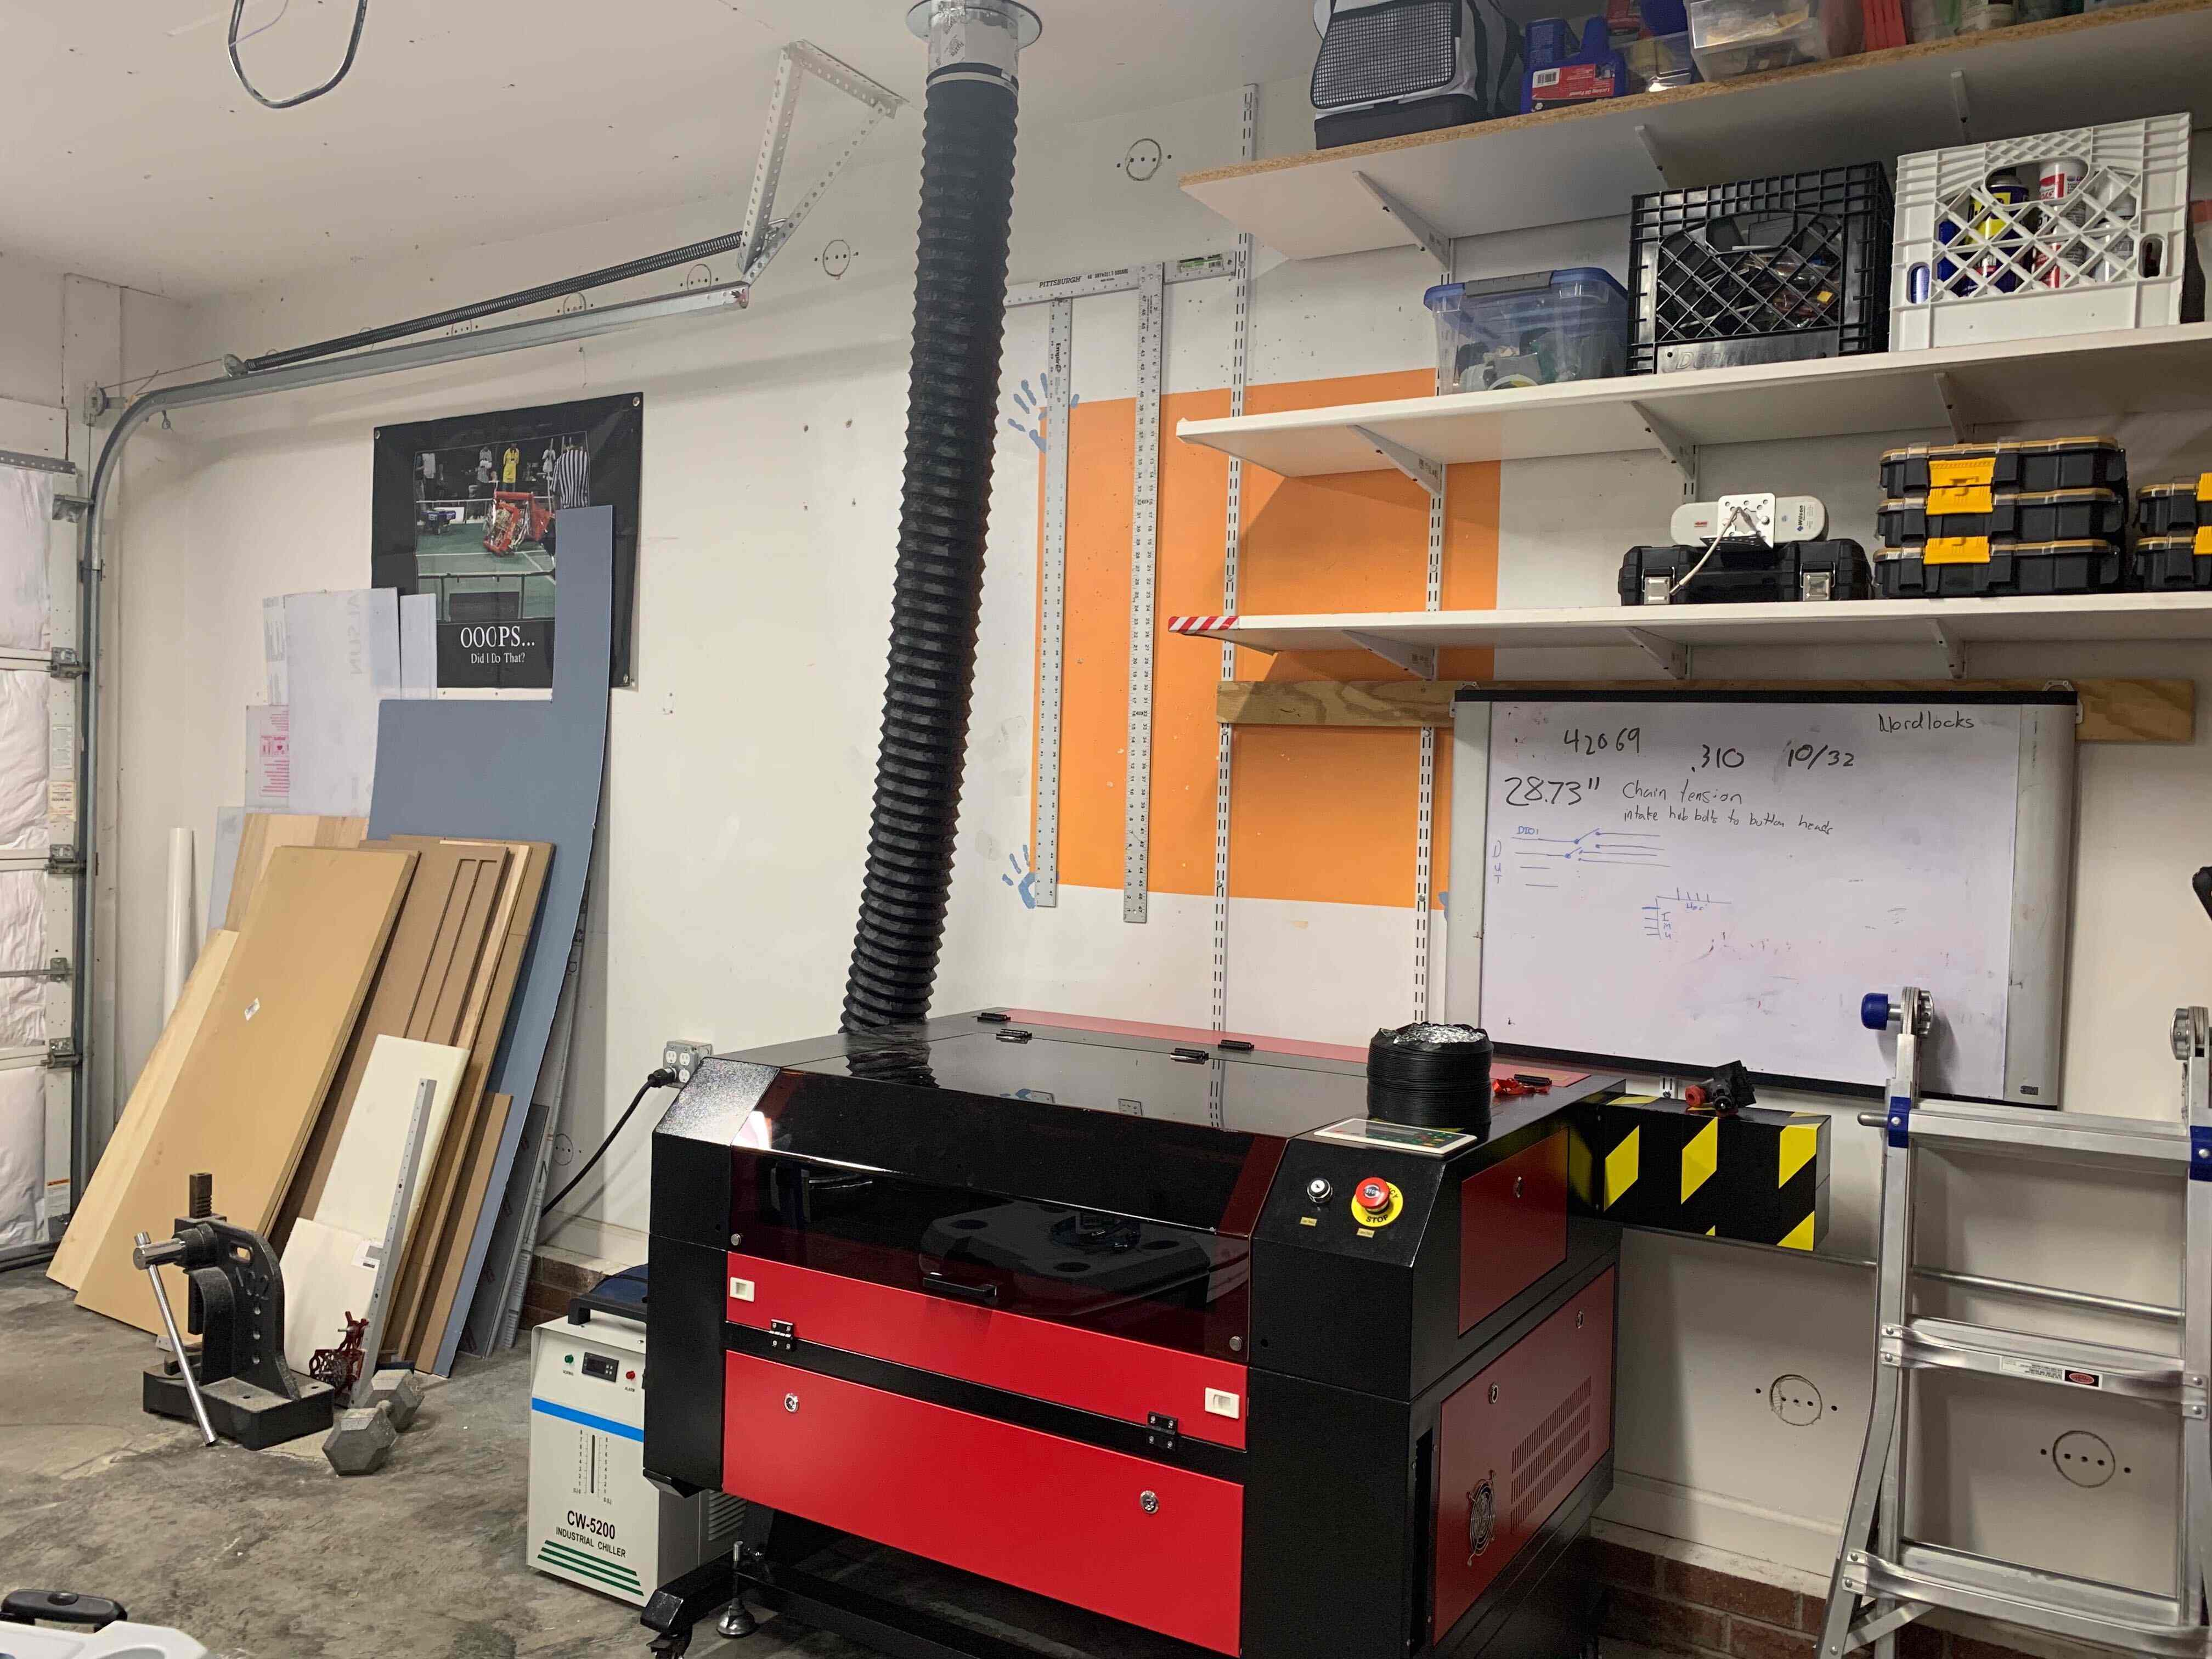
I received a phone call from the freight company about five days later, asking whether it could be delivered the following day. The laser arrived in a very sturdy crate and was easy to unpackage. The laser tube shipped in its box and was securely tucked away beneath the stage. For a laser cutter costing less than half the price of an equivalent “well-known” model, things weren’t looking too bad!
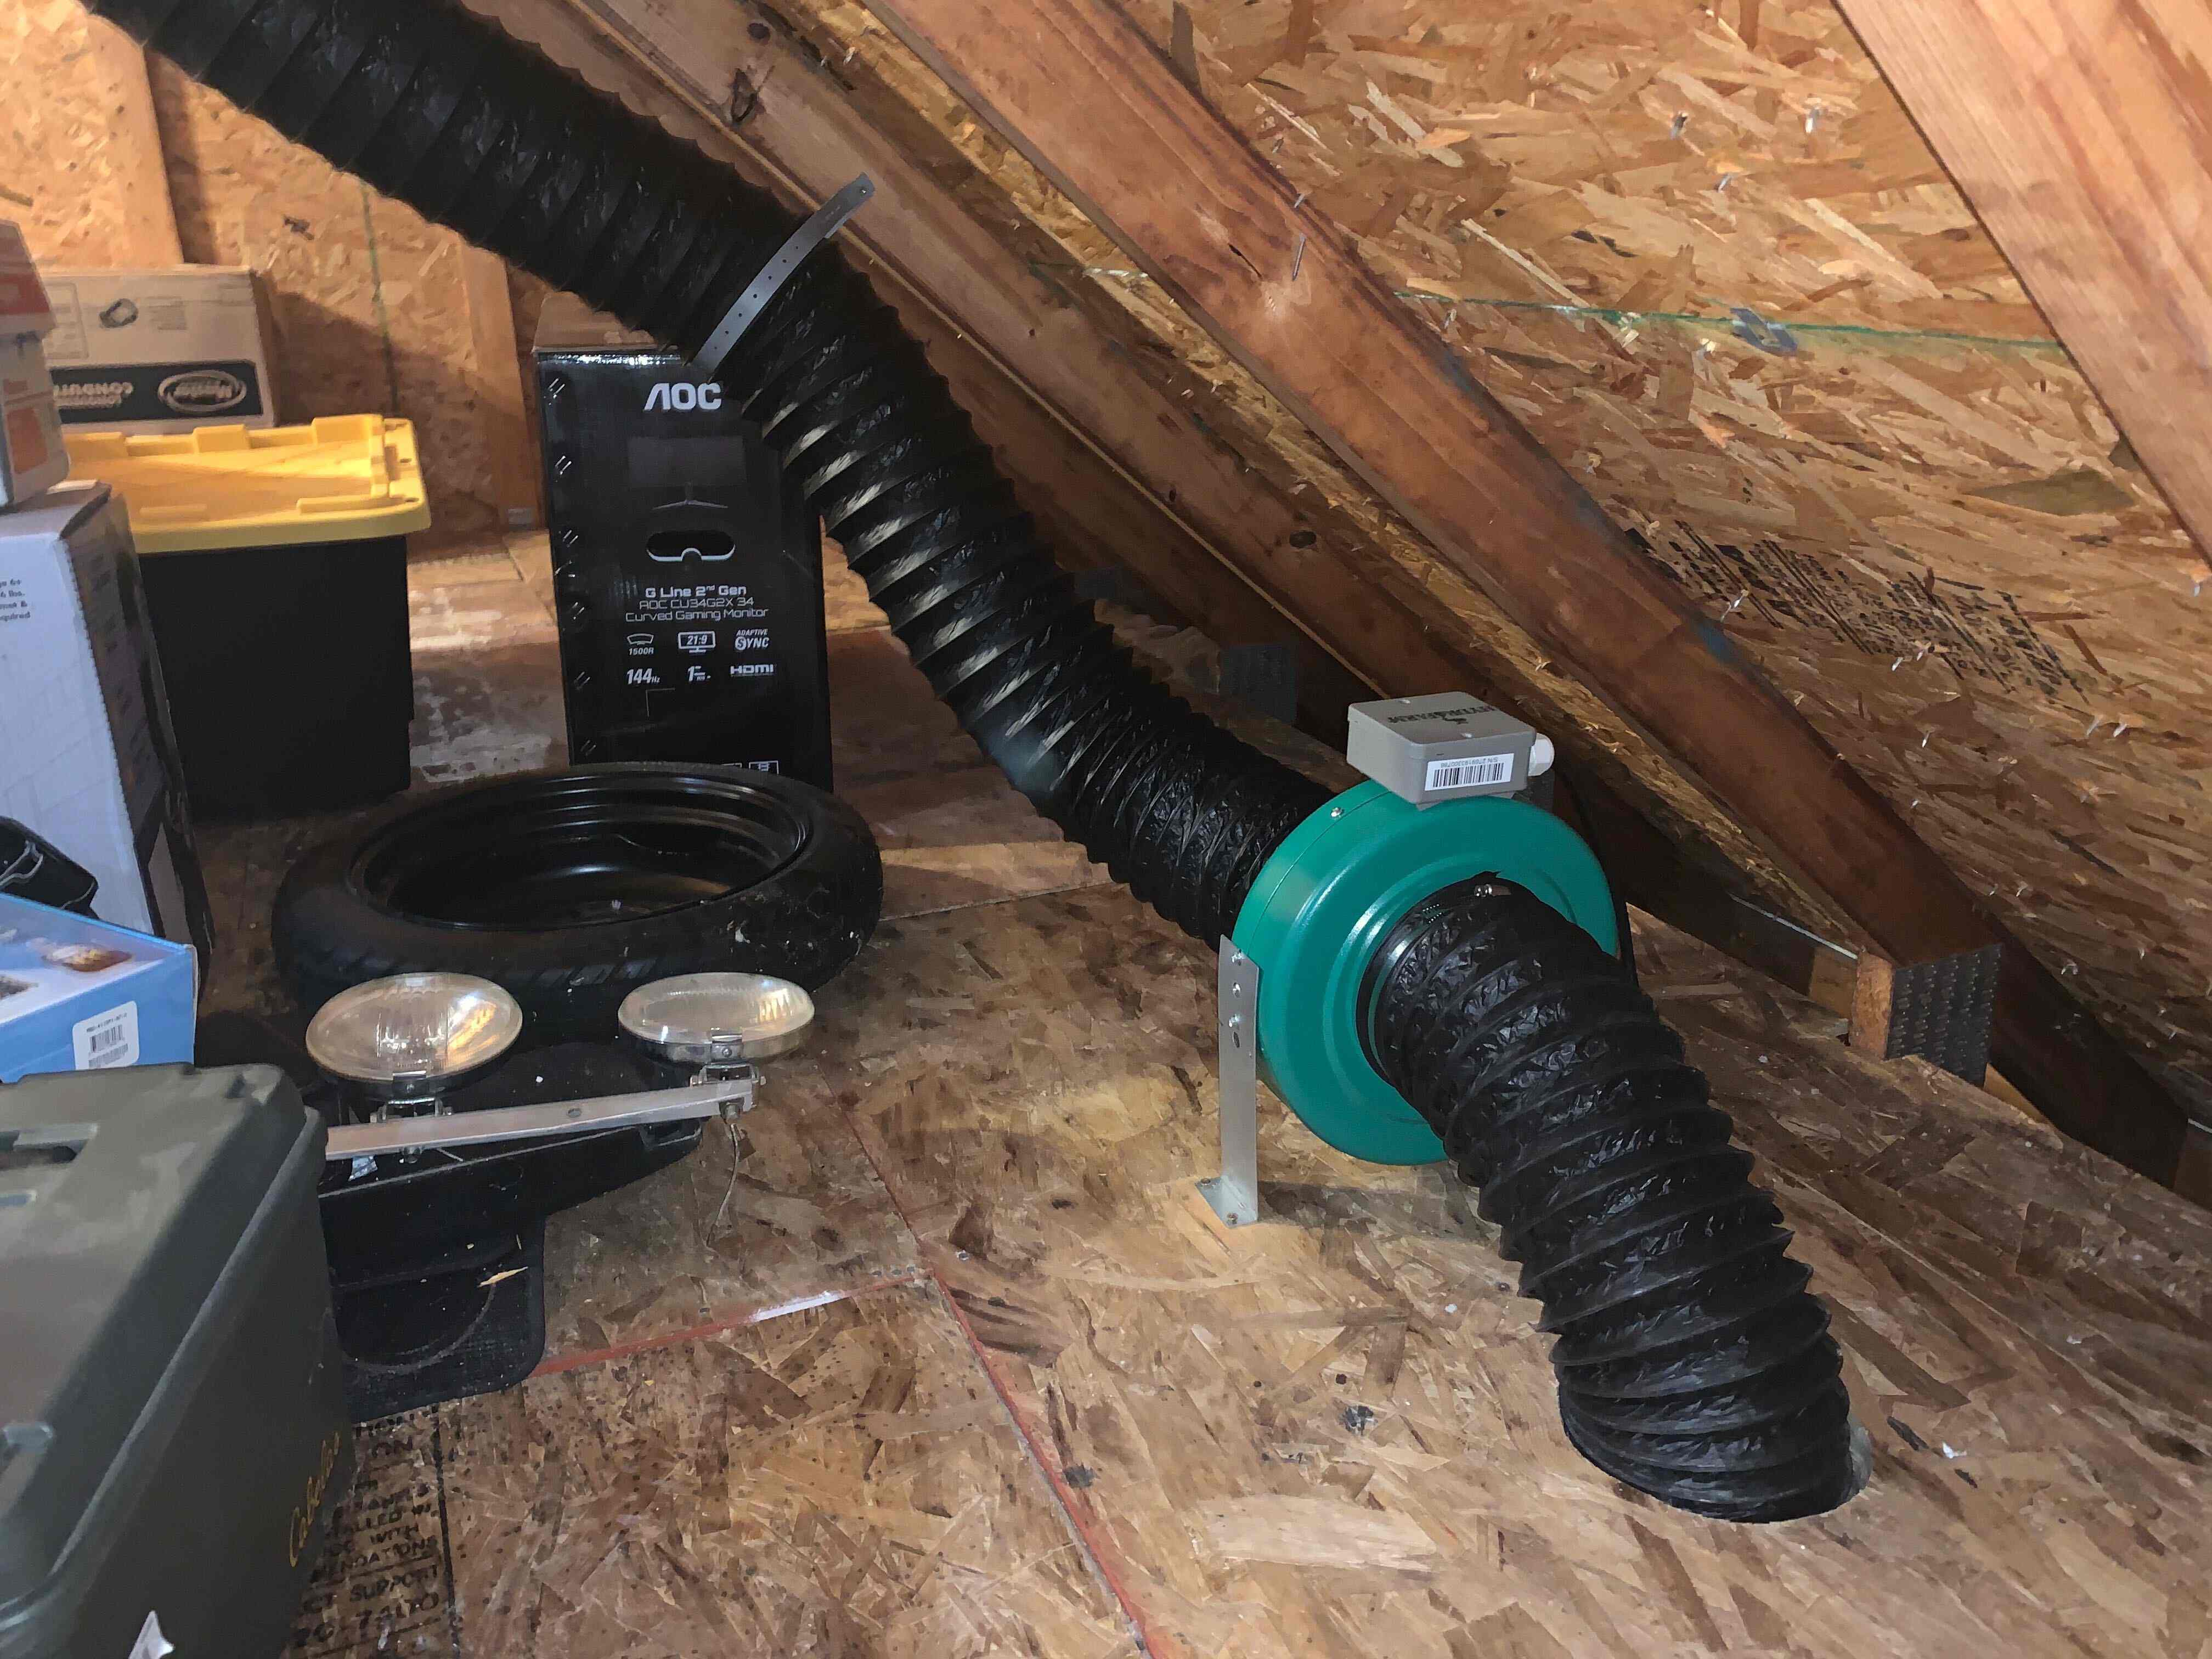
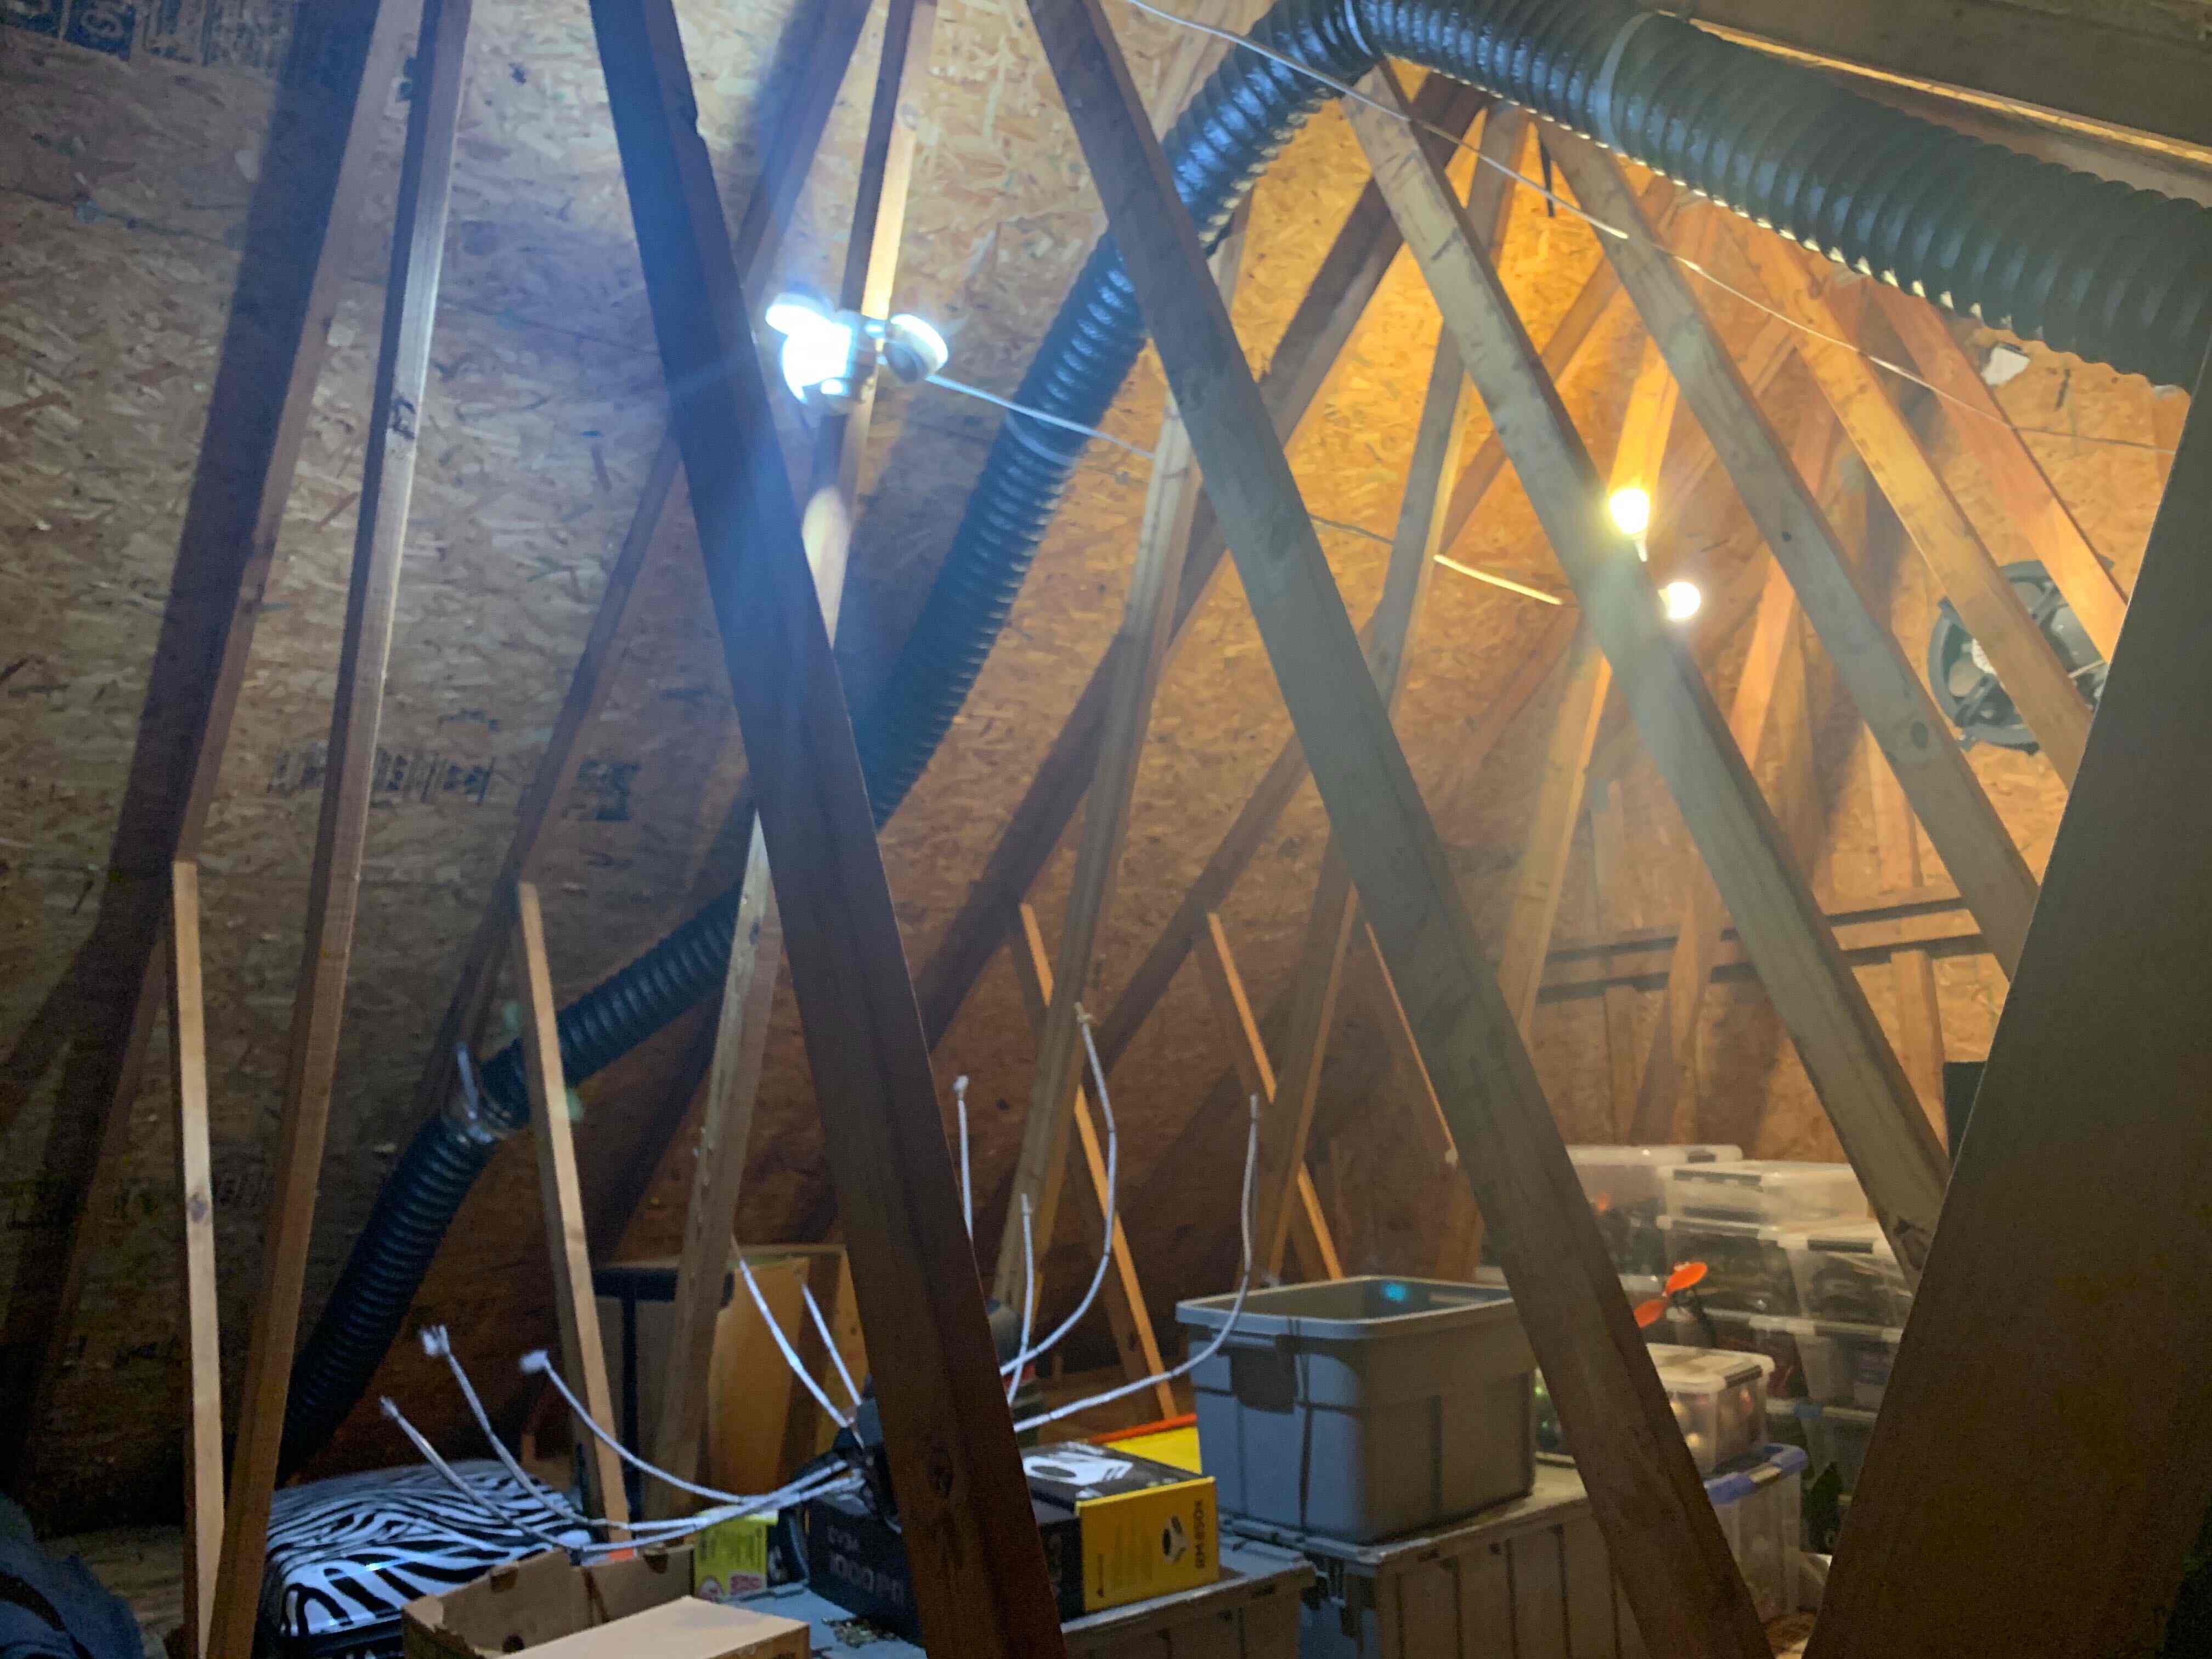
Exhaust Considerations and Installation
Once I started getting close to turning on the laser, I discovered that the included submersible pump wasn’t going to handle the heat generated by the laser tube. While I waited for my industrial chiller to arrive, I worked on installing a blower in our attic. While not necessary to run the exhaust into the attic and out of a secondary vent, I felt that it made using the laser easier and cleaner.
Initial Observations
Here are a few notes I took while setting up the laser for the first time:
- The build quality is decent. Aligning the mirrors is kind of a pain due to a lack of linear rail stages. Nothing feels “loose” to the point of requiring constant maintenance.
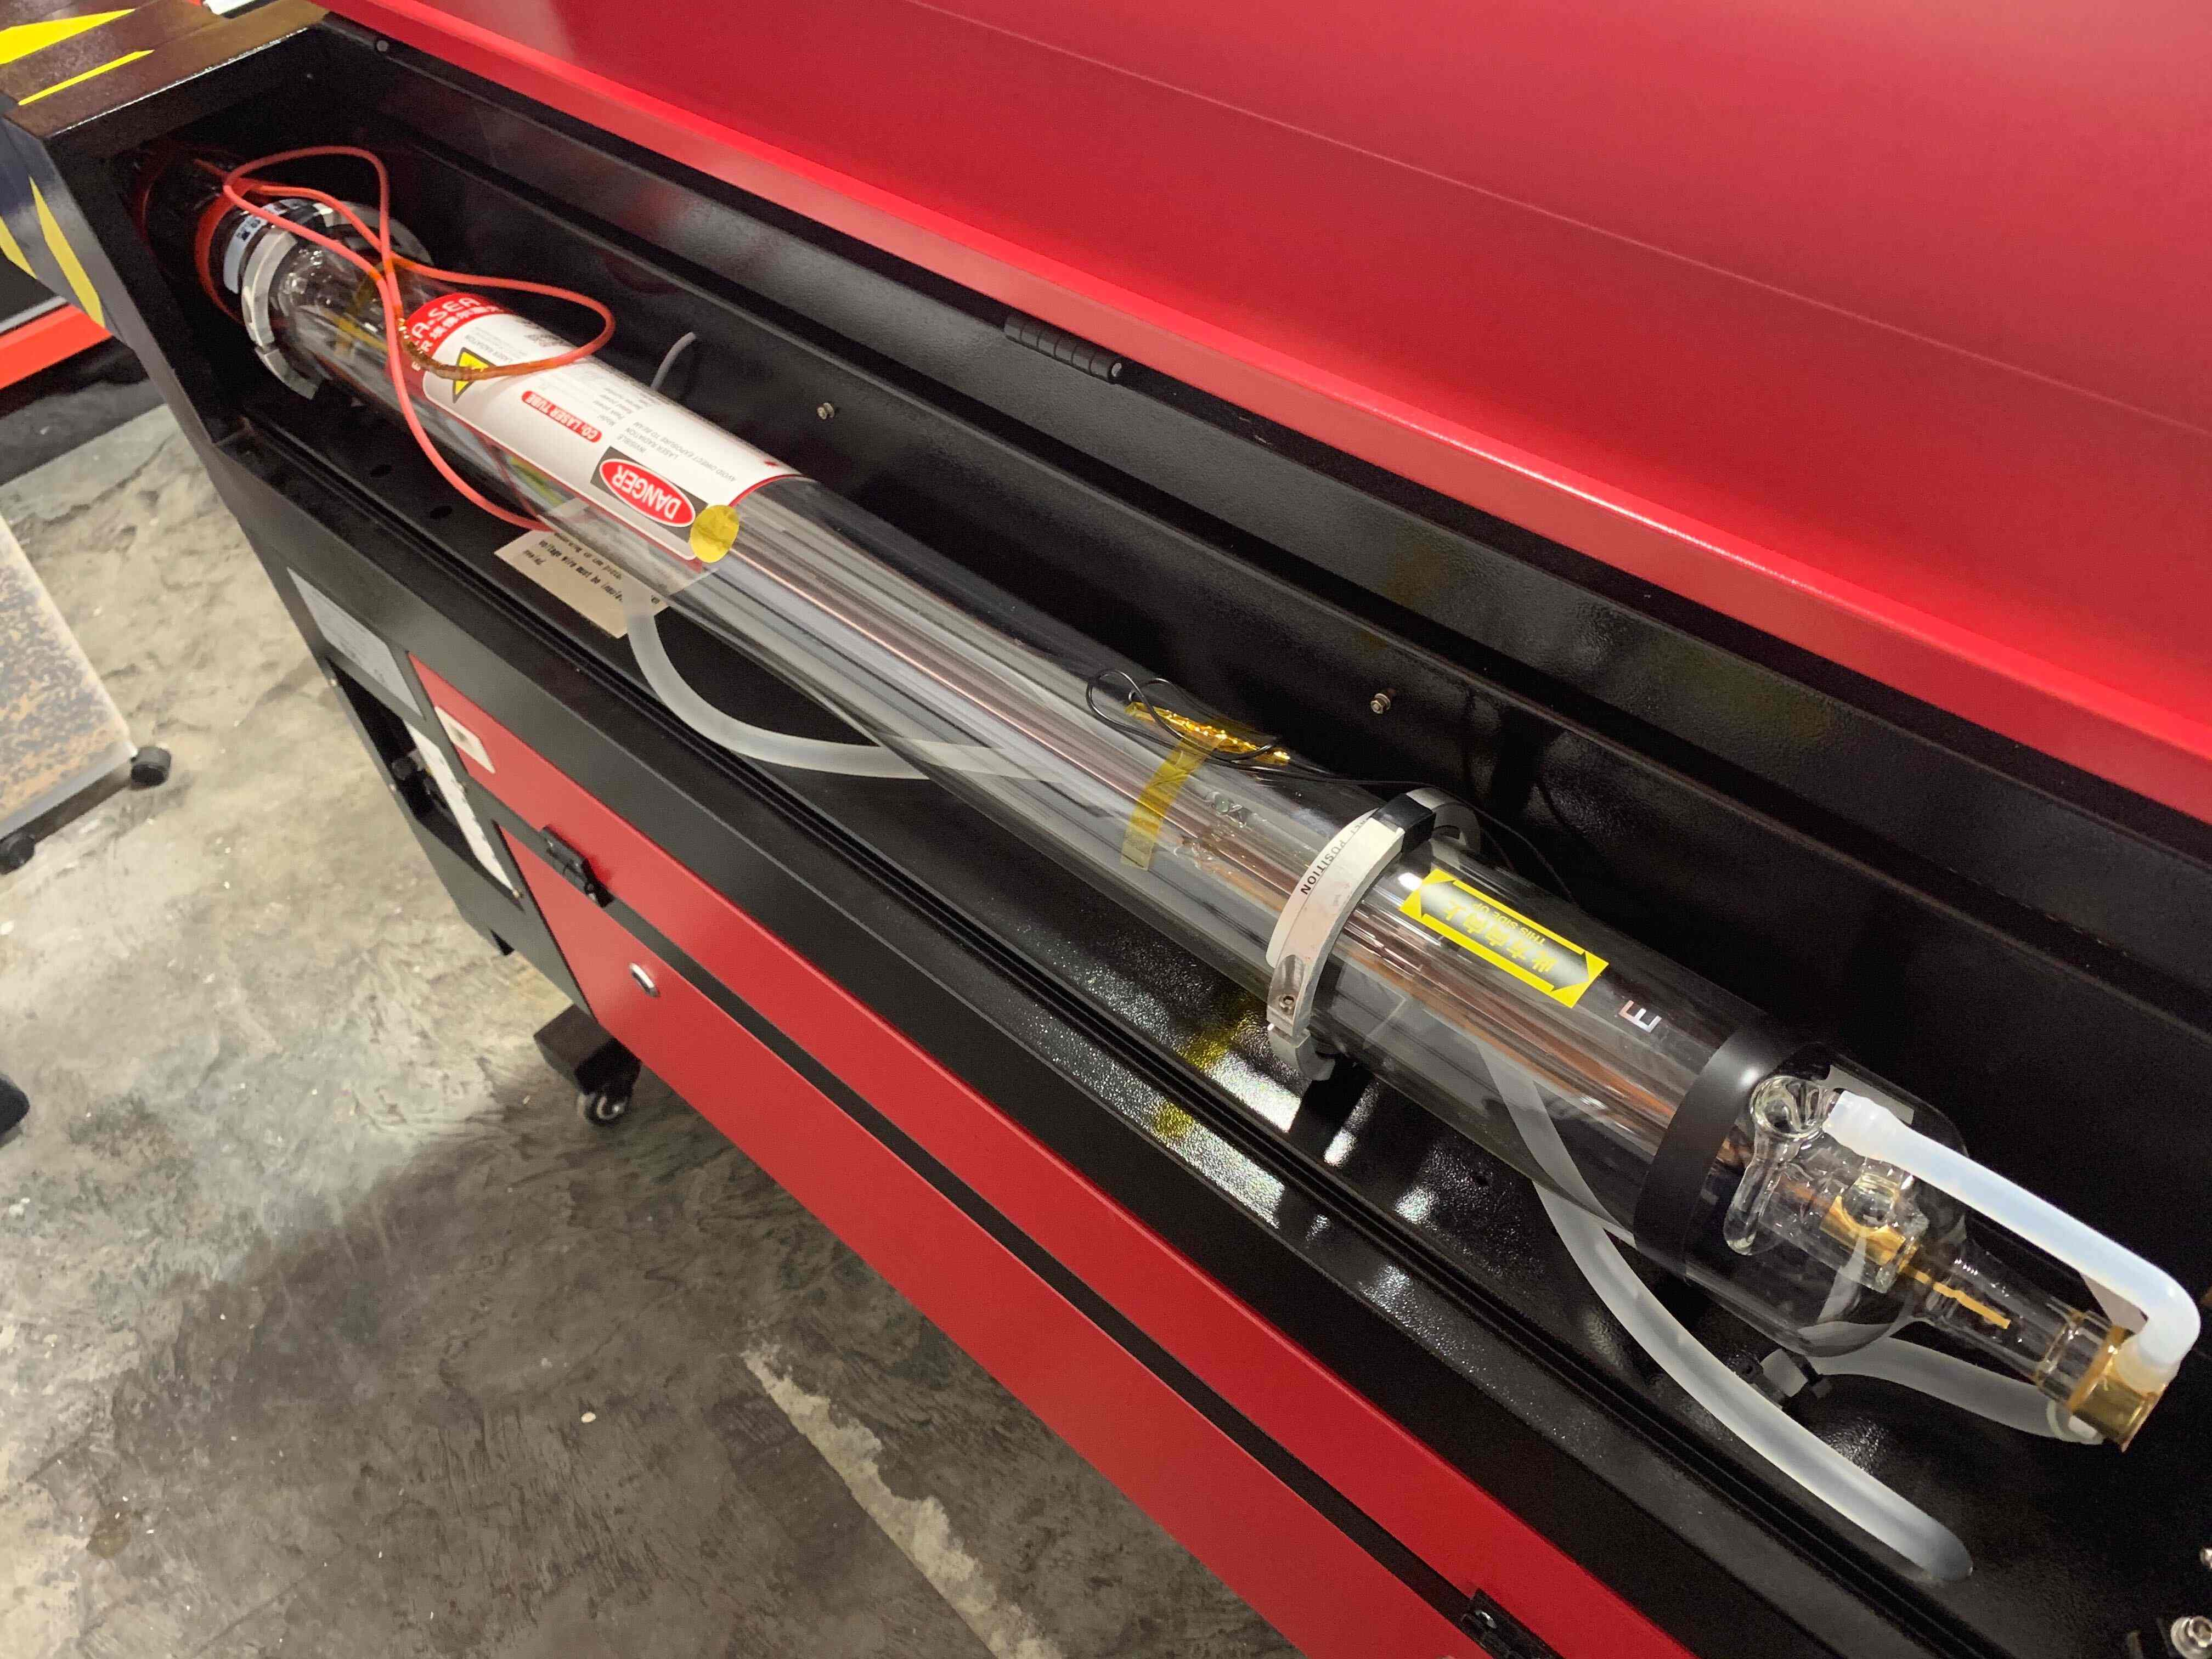
- This laser is made entirely of painted sheet metal. I don’t see any rust yet, but keep an eye out for coolant leaks and condensation.
- I had to replace the zip ties on the fluid lines acting as makeshift hose clamps with real hose clamps, so be sure to have a couple on-hand.
- The Ruida controller is great. It was automatically detected by Lightburn. Starting cuts/engraving jobs was extremely easy.
- The table is pretty big. I think it should work for most things that we’ll do in FRC. The front/back pass-through ports are also handy for feeding long sheets of material.
- The X and Y-axis limit switches are magnetic proximity sensors, not micro switches.
- The controller shipped with the correct table size out of the box. I didn’t have to do any configuring or adjusting to the controller directly.

Additional Observations and Notes
So far, I’ve logged a few cutting hours on the laser without any hiccups or issues. As I’ve been cutting more material, I’ve noticed a few, minor inconveniences that are good to point out:
- The high voltage power supply and electronics are of decent quality.
- The steel housing/case/structure isn’t sealed at all. Spend some time applying silicone to the plastic hood and buy a few rolls of rubber weatherstripping to properly seal everything. It’ll keep the smell down and make the exhaust fan work even better.
- Remove the built-in fan and “cheese grater” grill for better airflow. Be sure to properly cap off the wiring since the fan operates on 110V AC.
- Plan to use external/shop air for the air assist. The integrated pump is loud and terrible. 30PSI seems to work well for me.
Adding a Solenoid and Regulator to the Laser
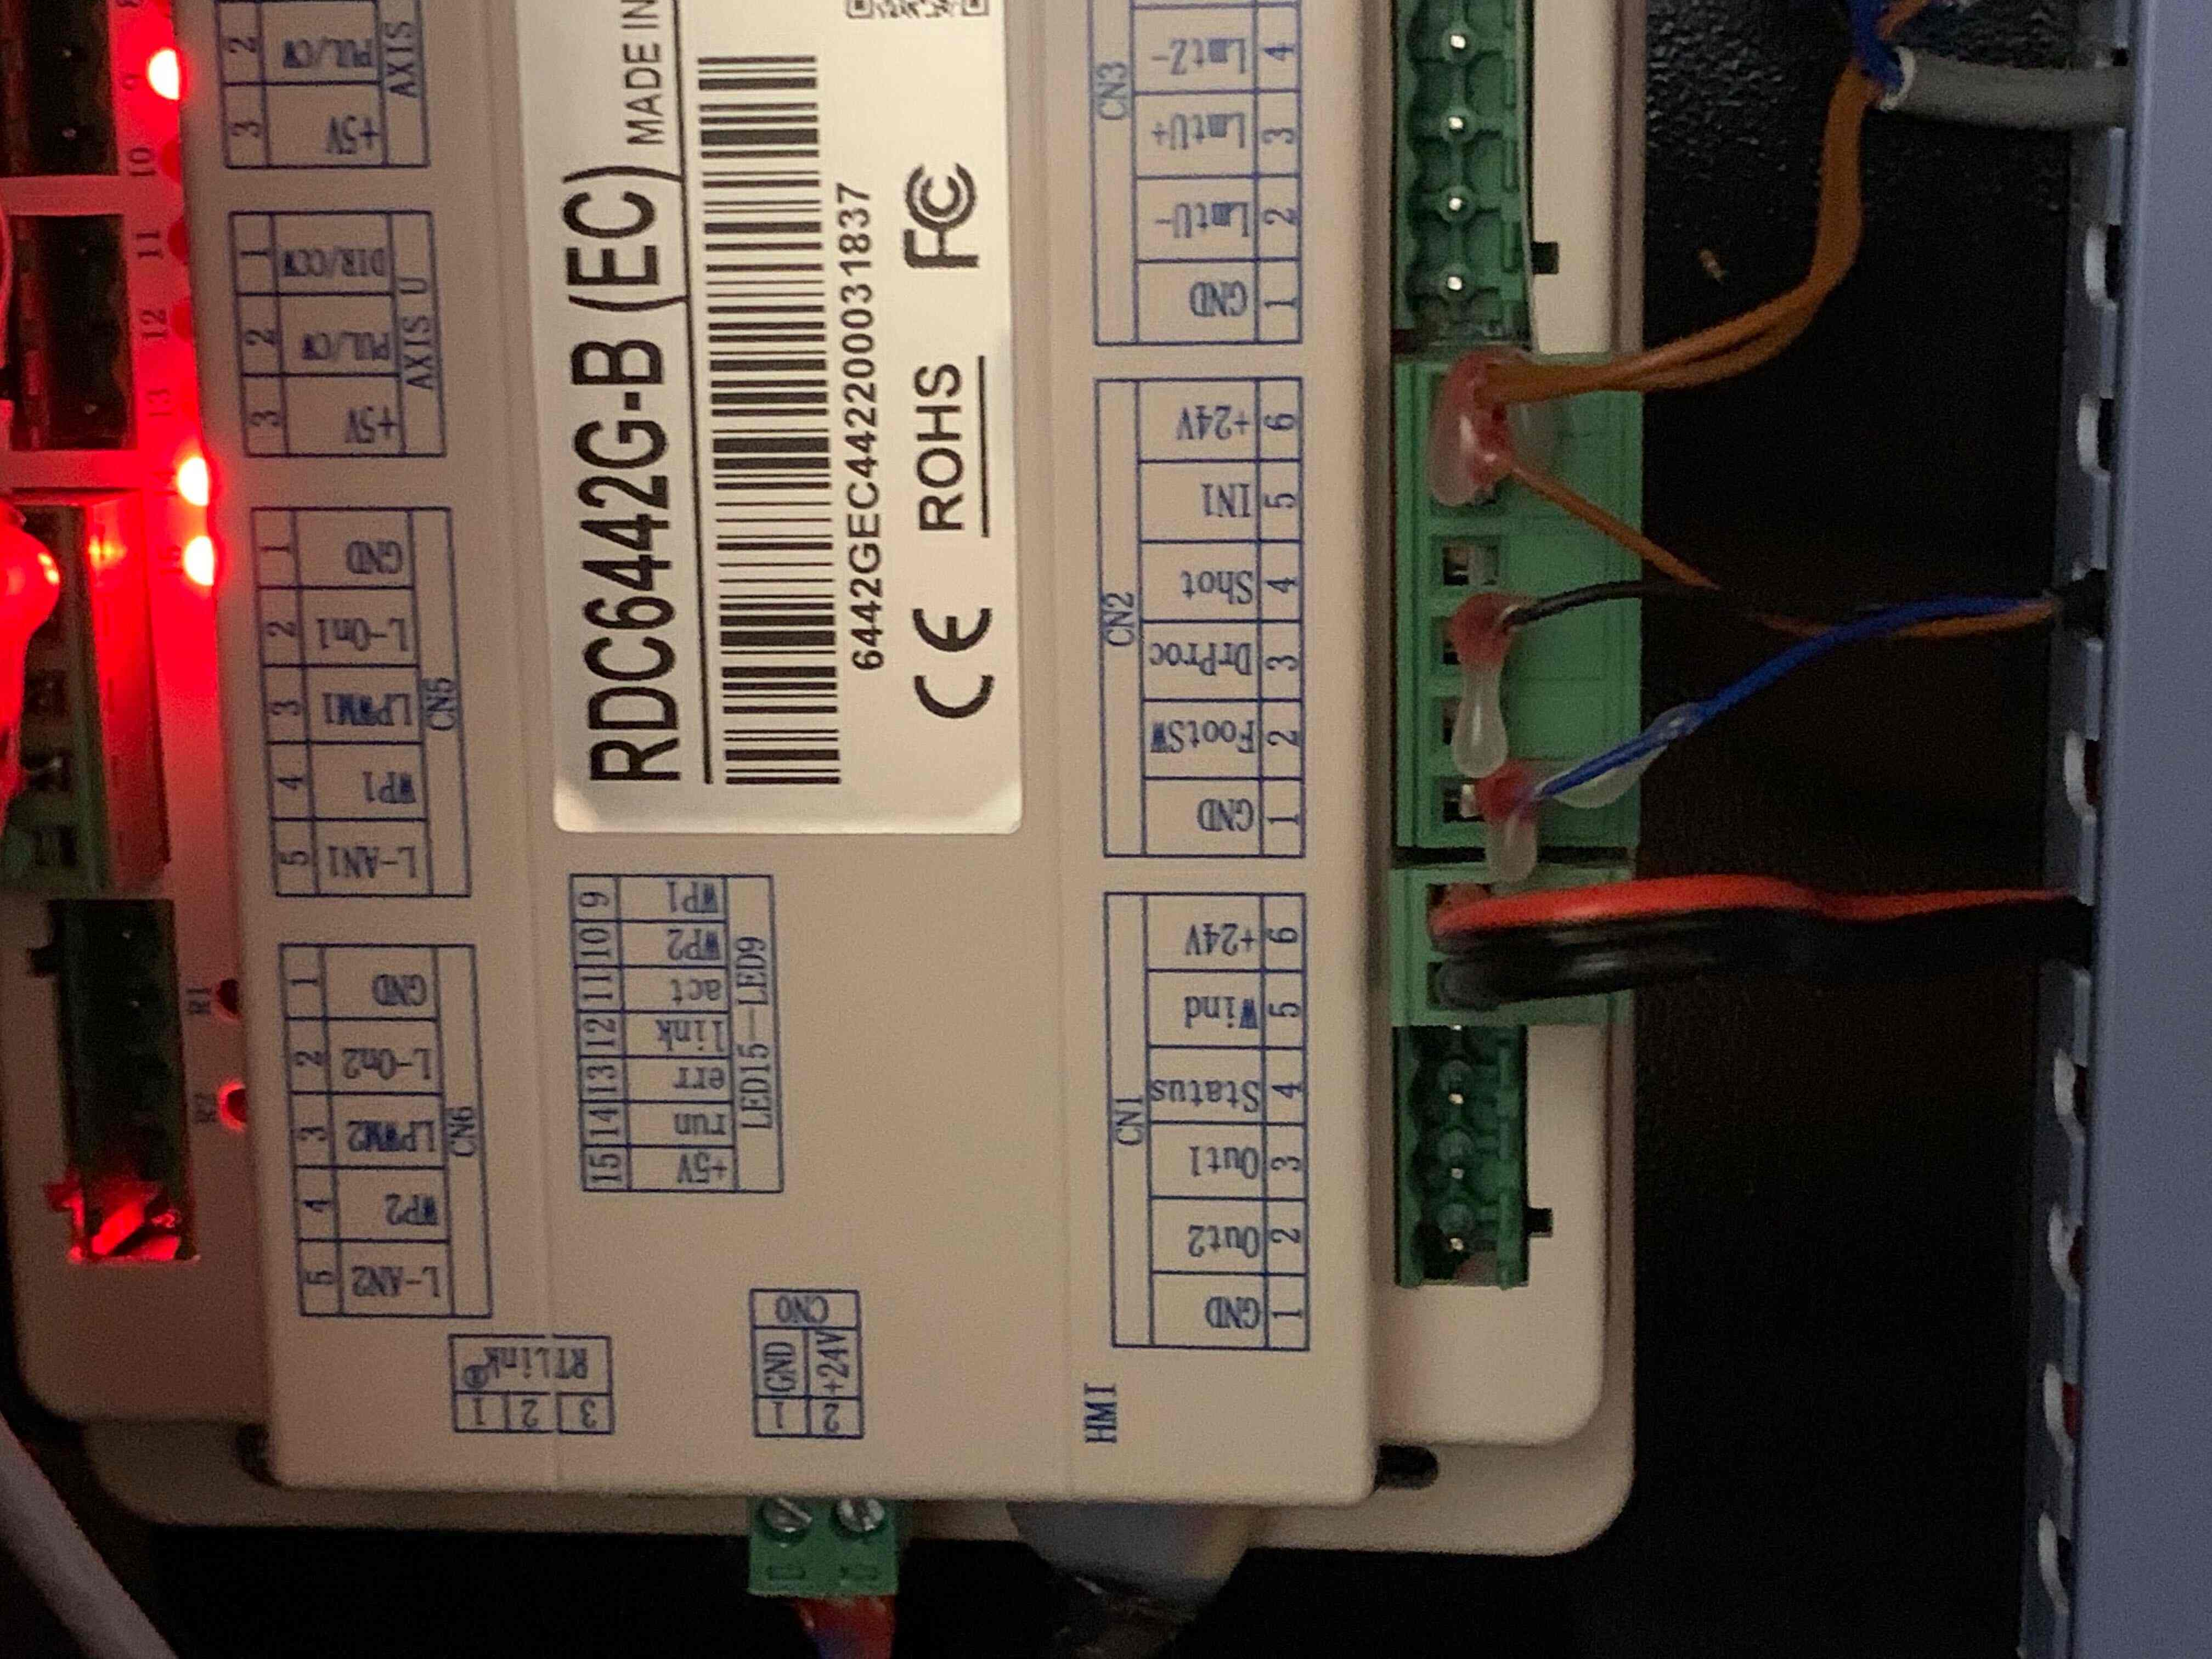
The first modification I’ve had to do to this laser was to add a solenoid valve to control the external air assist. The Ruida controller operates on 24V, so you’ll need a compatible, one-sided solenoid for this modification. I also decided to install a regulator and pressure gauge to keep from having to constantly adjust the air pressure available on my hose reel.
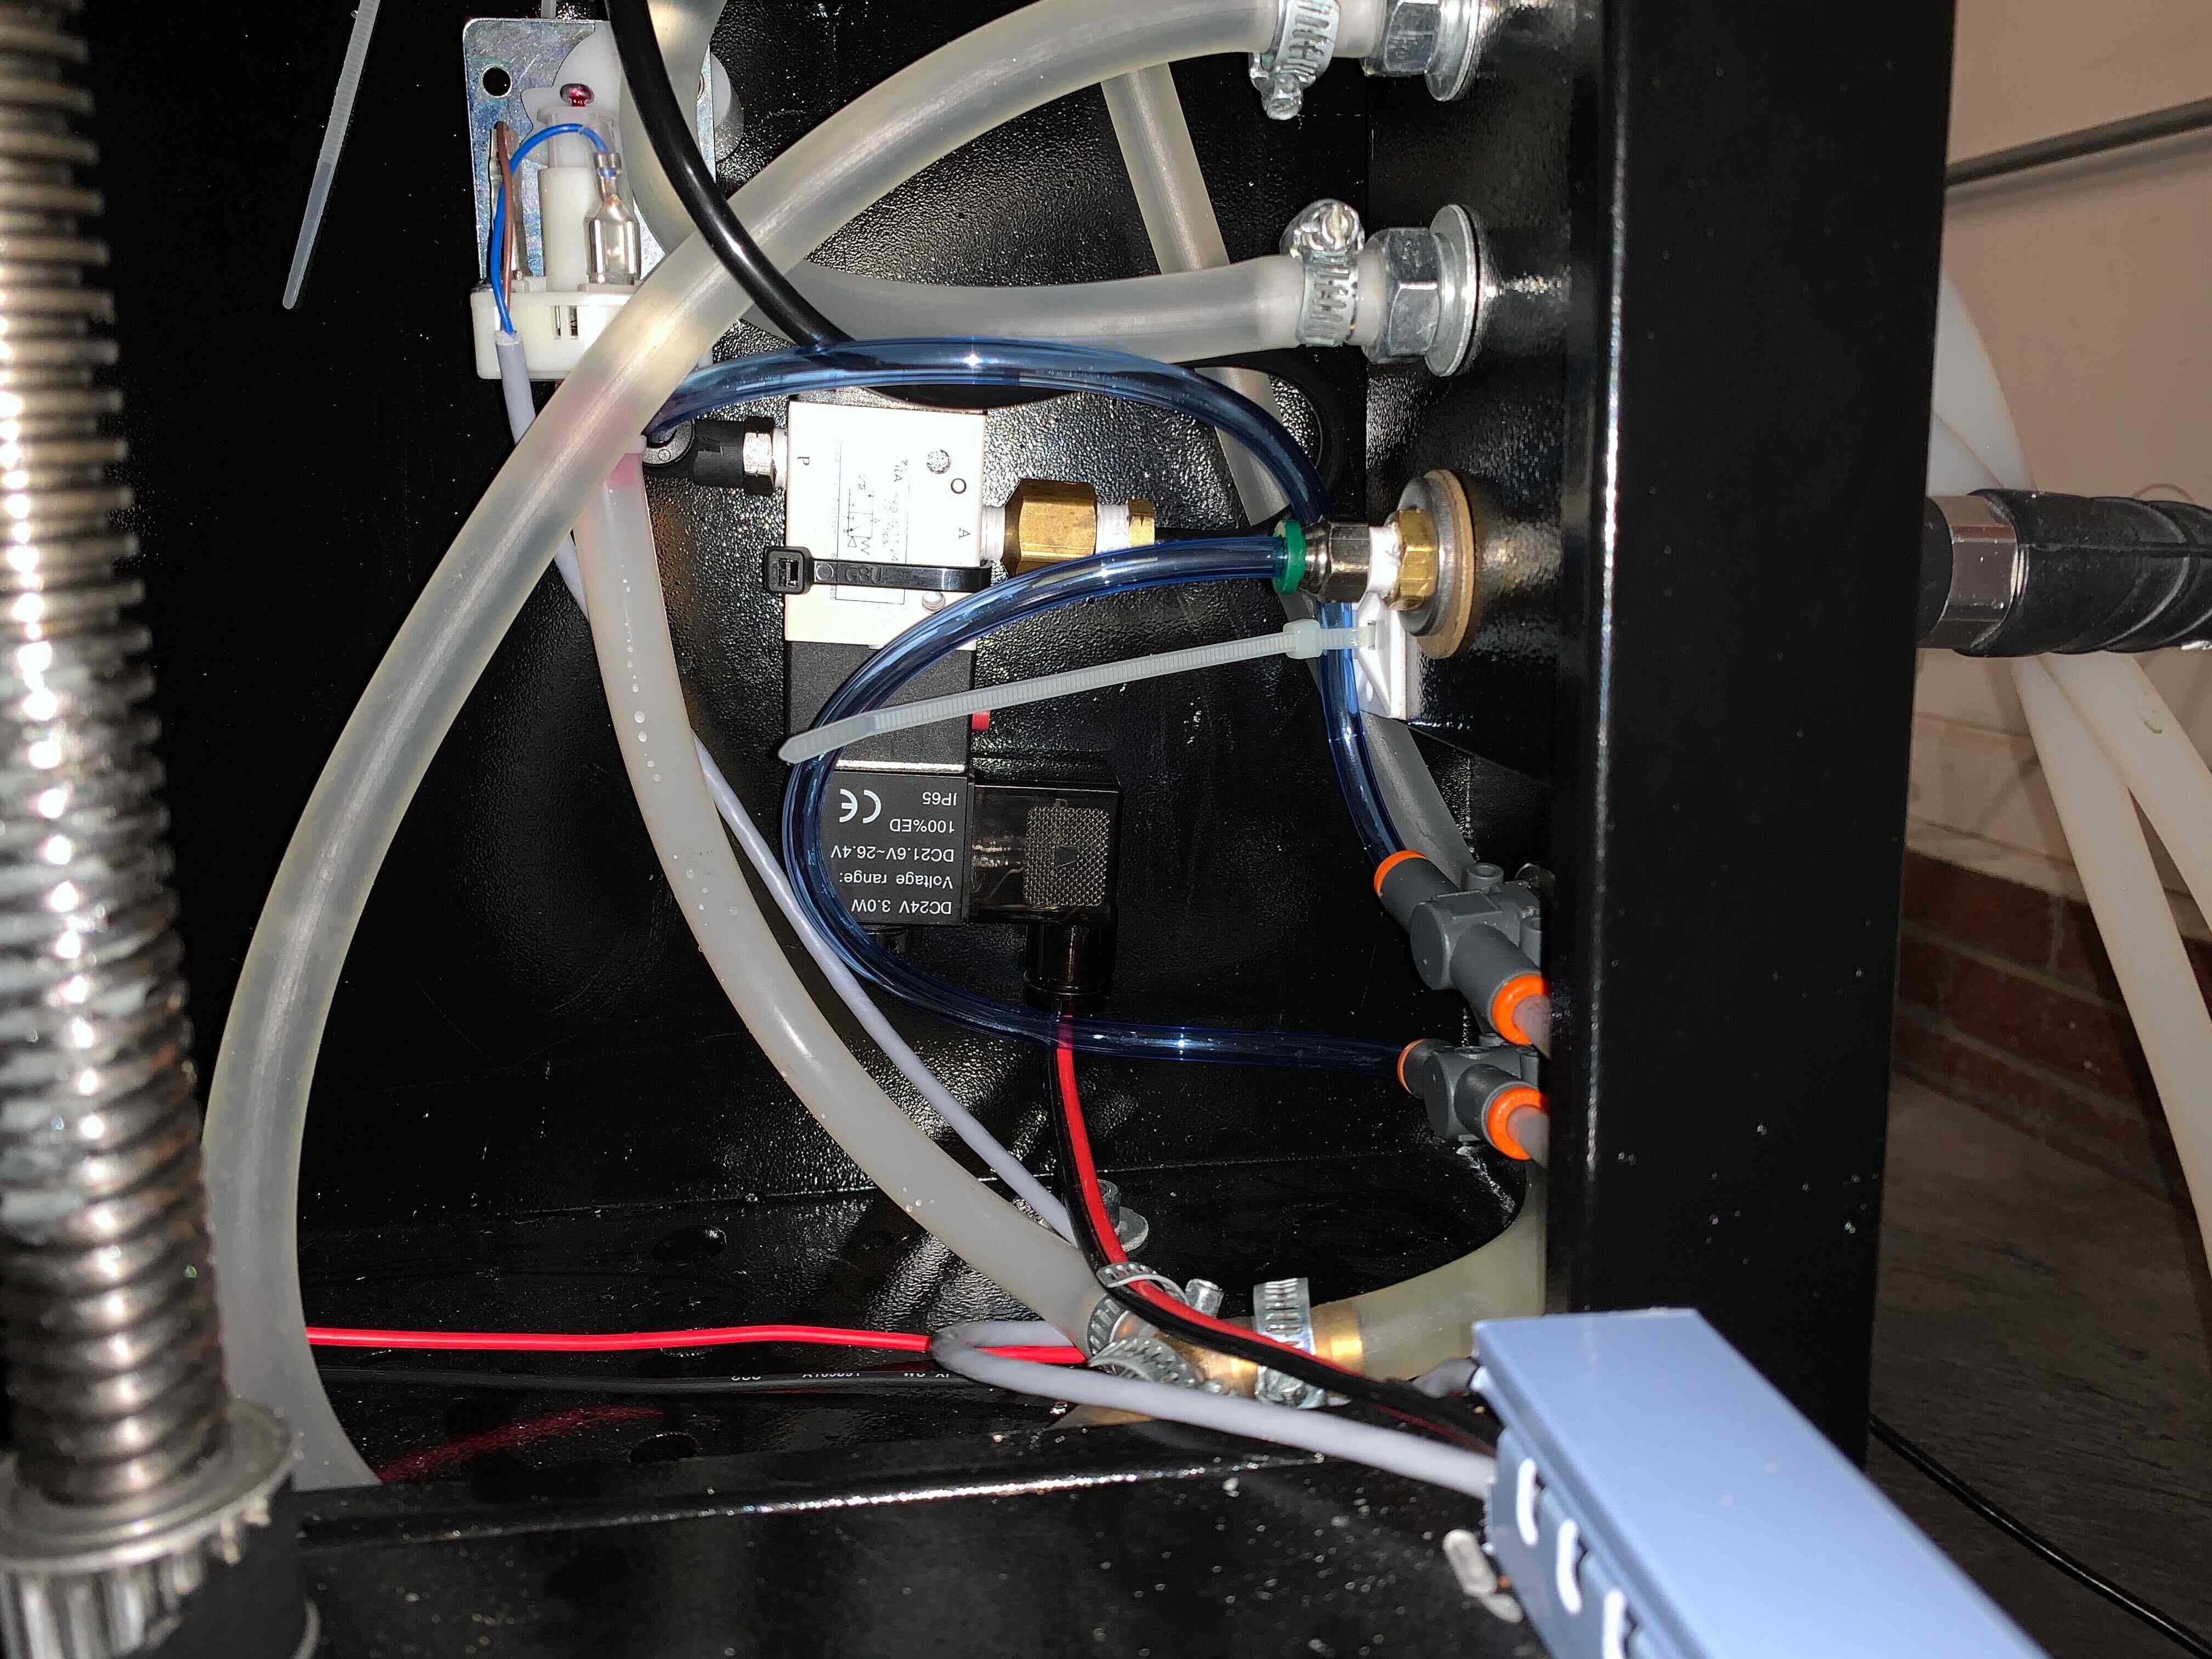
The Ruida controller has a port designed for controlling a solenoid for this application, but it’s not enabled by default. To enable the feature, you’ll have to use RDWorks to change the factory setting. Once you have the software installed, click on MENU>MENU>MENU, input the password PASSWORD, click the “ENABLE” checkbox, and write the settings to the controller.

Connect the positive wire of the solenoid to connector block CON1, 24V, and the negative side to connector block CON1, “Wind.” The controller doesn’t have a flyback diode built into this port, so you’ll need to add one externally to keep it from damaging itself. The diode should be connected near the solenoid if possible. I used a 1N4007 I had leftover from another project, but something like a 1N4005, 1N4006, 1N4007, 1N5819, etc. will all work.
Finally, you’ll need a 1/8” barb to 1/4” NPT adapter (available at Home Depot or Lowes) to adapt to a standard compressor connector.
I hope this helps! If you have any questions, please feel free to send me an email!